

Preface
A while ago I planned to buy a router to play with, because I’ve studied networking for so long without ever putting it to use, and I really wanted to try it. Besides, sometimes I need a LAN for gaming in the dorm, and always sharing a hotspot is inconvenient. So getting a router and flashing OpenWrt seemed like a good choice. At first I considered a portable Wi-Fi, but I found that the Qualcomm CPU in those is too weak to handle online gaming, so I bought an R3G that is said to be comparable to the K2P. Since it was my first time flashing breed and OpenWrt, there weren’t any ready-made tutorials online. The fragmented tutorials with wrong versions were quite painful to read. The journey was bumpy, and after finally succeeding, I’m documenting the process.
Enabling SSH
First flash the developer ROM. Copy the downloaded ROM package to the root directory of a FAT32-formatted USB drive and rename it to miwifi.bin. Also make sure there are no other “.bin” files in that directory, otherwise the flashing will fail. https://www.miwifi.com/miwifi_download.html
Unplug the Xiaomi router from power, insert the USB drive into the router’s USB port; Hold down the reset button, plug in the power, and release the reset button once the indicator starts blinking yellow. The router will begin flashing; Wait for the flashing to finish. The whole process takes about 3-5 minutes, and the system will reboot automatically when done. The router indicator turning blue means the flashing succeeded; if something goes wrong, fails, or the USB drive cannot be read, it will enter a red-light state. It’s recommended to retry or try another USB drive.
You need to install the MiWIFI app on your phone and bind an account (otherwise SSH won’t work). After binding, visit this website and download the SSH toolkit. https://d.miwifi.com/rom/ssh You could also try force-enabling SSH, but some people have reported that the shell obtained by force-enabling SSH fails during flashing.
Copy the bin file from the downloaded toolkit to the root directory of a USB drive (FAT/FAT32 format), making sure the filename is miwifi_ssh.bin; Unplug the Xiaomi router from power, insert the USB drive into the USB port; Hold down the reset button and reconnect the power. Release the reset button once the indicator starts blinking yellow; After waiting 3-5 seconds for the installation to complete, the Xiaomi router will reboot automatically, and then you can tinker to your heart’s content :)
Try SSH access. Since the dropbear version on the router is very old-school, you must add extra parameters to be compatible with that ancient algorithm.
ssh -oKexAlgorithms=+diffie-hellman-group1-sha1 -oHostKeyAlgorithms=+ssh-dss -oCiphers=+3des-cbc root@192.168.31.1Otherwise the connection will fail with
Unable to negotiate with 192.168.31.1 port 22: no matching key exchange method found.Their offer: diffie-hellman-group-exchange-sha1,diffie-hellman-group14-sha1,diffie-hellman-group1-sha1Back then I didn’t have an Ethernet cable, and binding the account required the phone app. I shared my computer’s wired network to the router and reset the router many times without success, and struggled for a long time. So I was quite excited to see it work.

Backing Up the Original Data
The backup for each device is slightly different. Mixing in backups from another device of the same model may lead to poor signal.
cat /proc/mtd to view the partition table, then back up each one in turn
dd if=/dev/mtd0 of=/extdisks/sda/ALL.bindd if=/dev/mtd1 of=/extdisks/sda/Bootloader.bindd if=/dev/mtd2 of=/extdisks/sda/Config.bindd if=/dev/mtd3 of=/extdisks/sda/Bdata.bindd if=/dev/mtd4 of=/extdisks/sda/Factory.bindd if=/dev/mtd5 of=/extdisks/sda/crash.bindd if=/dev/mtd6 of=/extdisks/sda/crash_syslog.bindd if=/dev/mtd7 of=/extdisks/sda/reserved0.bindd if=/dev/mtd8 of=/extdisks/sda/kernel0.bindd if=/dev/mtd9 of=/extdisks/sda/kernel1.bindd if=/dev/mtd10 of=/extdisks/sda/rootfs0.bindd if=/dev/mtd11 of=/extdisks/sda/rootfs1.bindd if=/dev/mtd12 of=/extdisks/sda/overlay.bindd if=/dev/mtd13 of=/extdisks/sda/ubi_rootfs.bindd if=/dev/mtd14 of=/extdisks/sda/data.bin #this line may fail to back up because the device is busy, no problemRestoring the Backup
mtd write /extdisks/sda/Bootloader.bin Bootloadermtd write /extdisks/sda/Config.bin Configmtd write /extdisks/sda/Bdata.bin Bdatamtd write /extdisks/sda/Factory.bin Factorymtd write /extdisks/sda/crash.bin crashmtd write /extdisks/sda/crash_syslog.bin crash_syslogmtd write /extdisks/sda/reserved0.bin reserved0mtd write /extdisks/sda/kernel0.bin kernel0mtd write /extdisks/sda/kernel1.bin kernel1mtd write /extdisks/sda/rootfs0.bin rootfs0mtd write /extdisks/sda/rootfs1.bin rootfs1mtd write /extdisks/sda/overlay.bin overlaymtd write /extdisks/sda/ubi_rootfs.bin ubi_rootfsFlashing breed
I was very worried about bricking the device, so in the previous step I backed up three times, compared the CRC32 of each, and only dared to continue after confirming they were all identical. (Actually, looking back, there was no need to be that cautious, but it’s a good habit anyway)
Download breed, search for the file whose name contains R3G in the directory, and download it https://breed.hackpascal.net/
Use WinSCP to transfer the file to a temporary directory, using the SCP protocol, not SFTP. (Note: FileZilla only supports SFTP, so it won’t work.) This website downloads the latest version, which at the time of writing is version 1.2, and its web operations differ considerably from version 1.1.
mtd -r write /tmp/XXX.bin Bootloader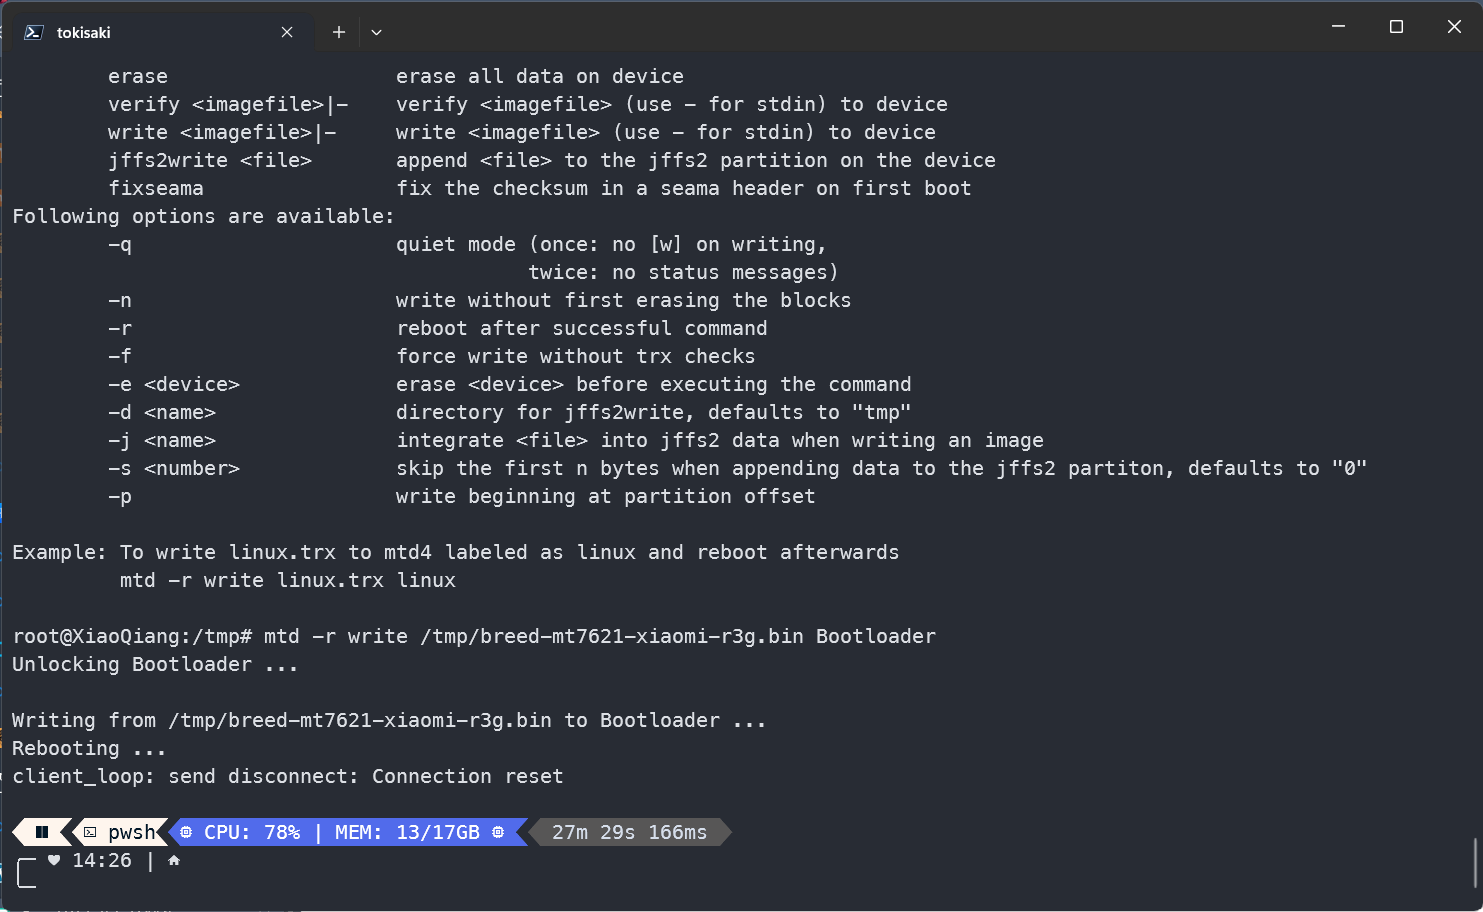
After confirming it’s done, hold down the RESET button and power on. When the router’s light starts blinking, release the RESET button and open 192.168.1.1 in a browser. (In general, you don’t need to assign an IP manually because there’s DHCP)
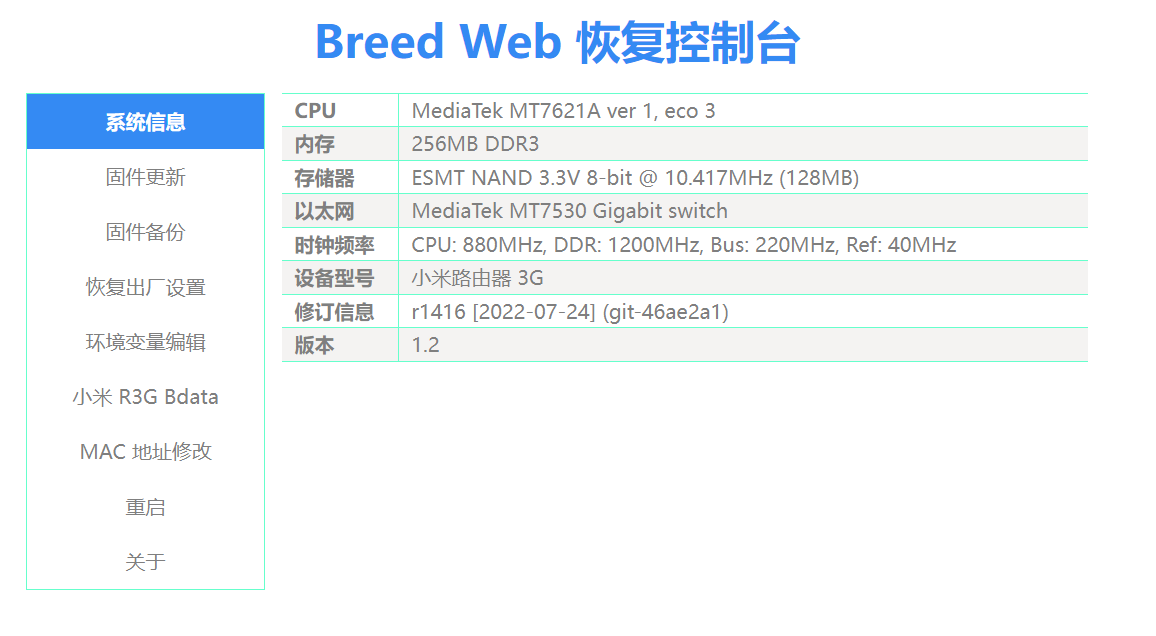
Backing Up in the Console
Back up the EEPROM and the programmer firmware. The EEPROM is the most important.
Flashing OpenWrt from the breed Console
I used this version of OpenWrt https://www.right.com.cn/forum/forum.php?mod=viewthread&tid=8303844
Download the base firmware package, then upload it. In breed v1.2, you only need to select the rootfs0 and kernel1 files, plus set the flash layout to Openwrt; no extra environment variables are needed, which is quite convenient. Check the option to auto-reboot after flashing, then wait patiently. Whatever you do, don’t cut the power. It is said that with v1.1 you have to set environment variables before it can boot
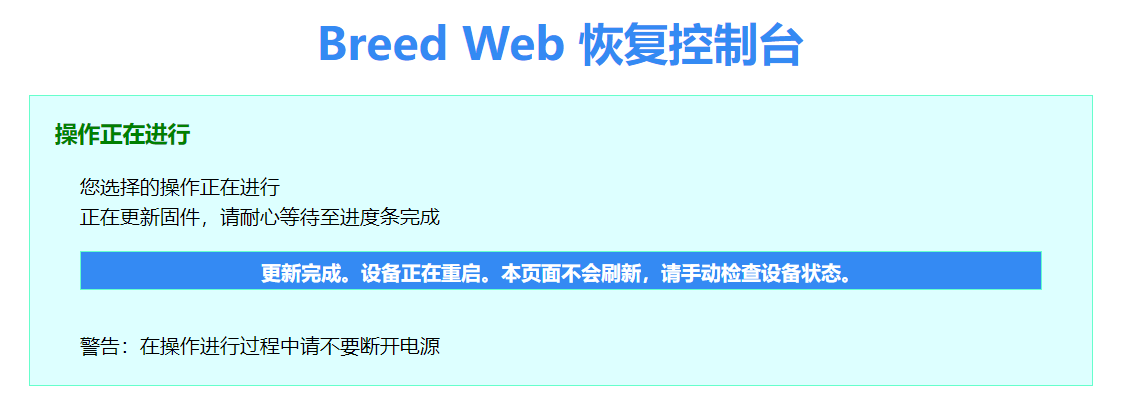
After entering OPENWRT, don’t think it’s over. You still need to continue with a firmware update using the sysupgrade.bin file.
Some Other Issues
mtd write mir3g-squashfs-kernel1.binkernel1mtd write mir3g-squashfs-rootfs0.binrootfs0nvram set flag_try_sys1_failed=1nvram commitrebootIn the commands above, nvram is an uboot-specific command. Breed and uboot are independent and do not share parameters. According to analysis of the Xiaomi router’s stock uboot on foreign forums, kernel0 on Xiaomi routers contains the USB recovery feature: name the official firmware miwifi.bin and put it on a USB drive, insert the USB drive into the router while it is unplugged, press and hold the reset button with a hard object, plug in the power, keep holding for about 10 seconds, and release after the yellow light blinks rapidly. This restores the official firmware and can be used to repair a corrupted stock firmware, which is a decent feature. That’s why the OpenWrt official website recommends flashing the kernel image into kernel1.
Updating Repositories
src/gz immortalwrt_core https://mirror.sjtu.edu.cn/immortalwrt/snapshots/targets/ramips/mt7621/packagessrc/gz immortalwrt_base https://downloads.immortalwrt.org/snapshots/packages/mipsel_24kc/basesrc/gz immortalwrt_luci https://downloads.immortalwrt.org/snapshots/packages/mipsel_24kc/lucisrc/gz immortalwrt_packages https://downloads.immortalwrt.org/snapshots/packages/mipsel_24kc/packagessrc/gz immortalwrt_routing https://downloads.immortalwrt.org/snapshots/packages/mipsel_24kc/routingsrc/gz immortalwrt_small8 https://downloads.immortalwrt.org/snapshots/packages/mipsel_24kc/small8src/gz immortalwrt_telephony https://downloads.immortalwrt.org/snapshots/packages/mipsel_24kc/telephonysrc/gz immortalwrt_core https://mirrors.cloud.tencent.com/openwrt/snapshots/targets/ramips/mt7621/packagessrc/gz immortalwrt_base https://mirrors.cloud.tencent.com/openwrt/snapshots/packages/mipsel_24kc/basesrc/gz immortalwrt_luci https://mirrors.cloud.tencent.com/openwrt/snapshots/packages/mipsel_24kc/lucisrc/gz immortalwrt_packages https://mirrors.cloud.tencent.com/openwrt/snapshots/packages/mipsel_24kc/packagessrc/gz immortalwrt_routing https://mirrors.cloud.tencent.com/openwrt/snapshots/packages/mipsel_24kc/routingsrc/gz immortalwrt_small8 https://mirrors.cloud.tencent.com/openwrt/snapshots/packages/mipsel_24kc/small8src/gz immortalwrt_telephony https://mirrors.cloud.tencent.com/openwrt/snapshots/packages/mipsel_24kc/telephony